
How to Organize a Garage Workshop: Zones, Shelves, and Labels
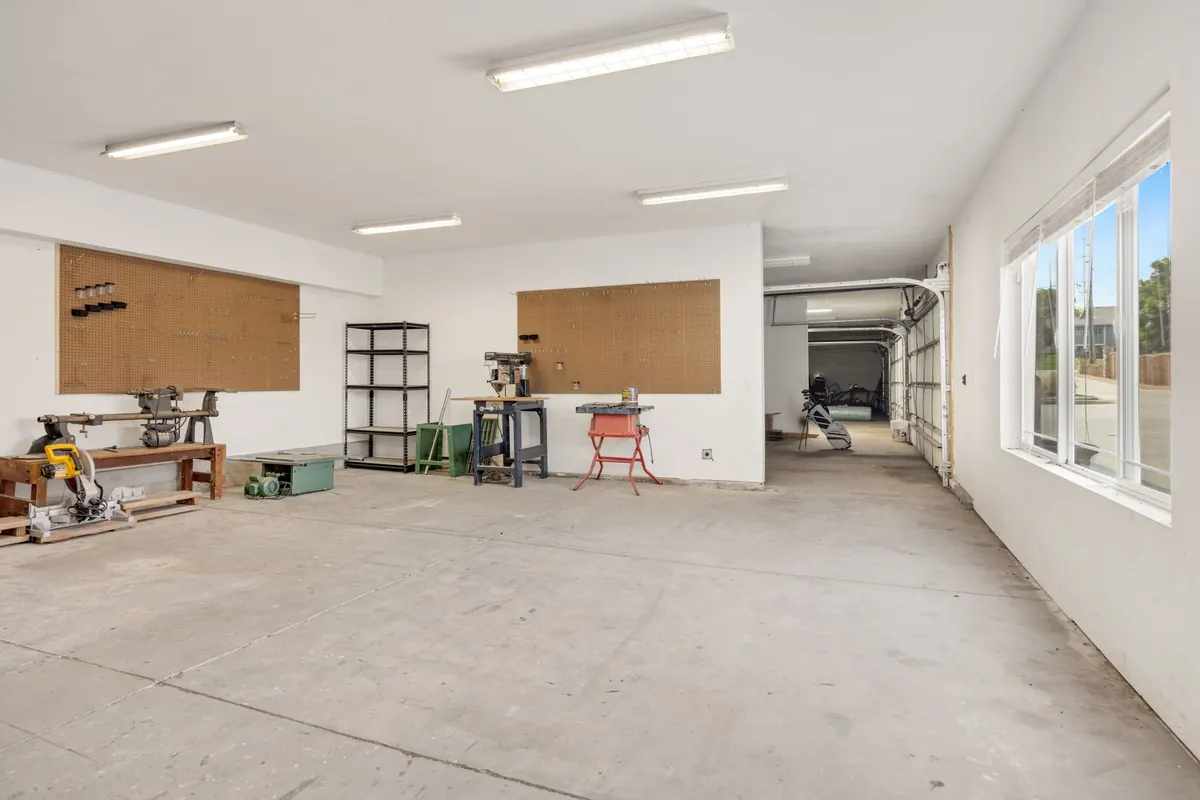
A garage workshop rarely fails for lack of space. It fails because the drill bits live in a coffee can beside the bike helmets, the extension cords are somewhere behind the paint, and every project starts with twenty minutes of searching. The space isn't too small — it's undecided. Once each wall has a job, and the shelves and labels match that job, the same square footage feels twice as large. Here's how to divide a garage into tool, gardening, sports, and automotive zones, and set up storage you'll keep using.
Map the Space Before You Buy a Single Shelf
Start with a tape measure and a rough sketch on graph paper. Mark the doors, the overhead door tracks, the electrical panel, the water heater, and any windows. Note what clearance each one needs, because a shelf installed in the wrong spot is worse than no shelf at all. An electrical panel needs a clear working area in front of it, garage door tracks need to stay untouched, and the driver's side of a parked car needs enough room to open a door.
Next, walk through a full year of your own stuff. Not a theoretical garage — yours. Snow blower, mower, leaf bags, bikes, kayaks, camping bins, holiday decorations, spare tires, car ramps, potting soil, hoses, half-finished projects. Write it all down, then sort it into four piles: tools, gardening, sports, automotive. Whatever doesn't fit gets its own small category, usually household overflow or seasonal decor.
Then place the zones by traffic. The most-used zone belongs closest to the door you walk through. Tools want to sit near your workbench and your outlets. Gardening gear should be near the door that leads outside, so you aren't carrying a full watering can across the garage floor.
The Four Zones and What Belongs in Each
Zoning works because it removes small decisions. When you know everything garden-related lives in one corner, putting the pruners away takes three seconds instead of thirty.
Tool zone
Anchor this around the bench. Hand tools on pegboard at eye level, power tools on a shelf at waist height, fasteners and drill bits in small organizers you can carry to the job. Keep a clear three-foot strip in front of the bench so you can pull out a miter saw without rearranging anything.
Gardening zone
Bags of soil and heavy pots go on the lowest shelf, where you can slide them rather than lift them. Long-handled tools hang on wall clips. The hose reel lives by the exterior door. Store any fertilizer or pest product according to its label, upright and out of reach of children and pets.
Sports zone
Bikes hang from hooks rated for their weight, spaced so handlebars don't tangle. Balls, pads, and small gear go in labeled bins. Helmets belong on a shelf, not on the floor where they get stepped on.
Automotive zone
Fluids, jumper cables, the jack, ramps, and the snow brush live together, ideally in one lidded bin so a slow leak doesn't ruin a shelf. Nothing that can spill goes above anything you care about.
A few rules apply to all four zones:
- Heavy items low, light items high. A full paint can falling from shoulder height is a bad afternoon.
- Reserve the top shelf for seasonal or once-a-year items you don't mind retrieving on a step stool.
- Leave one empty two-foot section on each shelf. Storage with no slack stops working the first time you buy something new.
- Keep anything you use weekly between knee and shoulder height, where reaching takes no effort.
Shelves: Height, Depth, and Anchoring
Depth is where garage shelving usually goes wrong. Twelve inches holds small parts, cans, and stacked bins. Sixteen inches fits most standard totes. Twenty-four inches handles camping gear and car supplies. Anything deeper than two feet becomes a place where things disappear, because you can't see the back of it.
For height, think in terms of a reachable band roughly from mid-thigh to about a foot above your head. Everything above that is long-term storage; everything below is for the heaviest items you own. If you're building a wall of shelves, work in this order:
- Mark your shelf heights on the wall with painter's tape and stand back to check them before drilling.
- Locate the studs with a finder and mark them clearly.
- Attach ledger boards or heavy-duty bracket tracks into studs, not drywall alone.
- Cut shelves to length, leaving a small gap at each end so nothing rattles or binds.
- Load the bottom shelf first and step back. If anything flexes, add a support before continuing.
Plastic shelving units are fine for light bins, but paint, engines, and full toolboxes belong on wood or steel that's fastened to the wall.
Pegboard, Cleats, and Hooks
Wall storage is the cheapest square footage in a garage, and it keeps tools visible. A panel of pegboard over the bench handles pliers, screwdrivers, and measuring tools. A French cleat system — a beveled board on the wall with matching hooks and holders that lift on and off — lets you rearrange as your tool collection changes. Screw-in hooks work for ladders, cords, and long-handled tools, but test each one with a firm pull before you trust it with weight.
Labels Do More Work Than Any Shelf
A label isn't decoration; it's an instruction to your future self. Without one, a bin becomes a mystery box, and mystery boxes get shoved to the back. A few habits make labeling stick:
- Label the shelf edge as well as the bin, so the home for each bin stays obvious even when the bin is out on the driveway.
- Use the same words every time. "Painting — interior" and "Paint stuff" are two different systems, and you'll only remember one.
- Color-code by zone: one color for tools, one for gardening, one for sports, one for automotive. A quick glance tells you where something belongs.
- Write on painter's tape with a permanent marker for temporary labels, and save the printed labels for bins you'll keep for years.
- Add a rough contents note to seasonal bins — "holiday lights, extension cords, timers" — so you don't open four lids to find one item.
Start With the Zone You Use Most
A full four-zone conversion is a weekend or two of work, and you don't have to do it all at once. Pick the zone that frustrates you most — usually tools — and finish it properly: empty it, wipe it down, add one shelf and one pegboard panel, label everything, and stop. Live with it for a week. You'll quickly see what's too high, what's too deep, and what you keep reaching past, and you can correct those before repeating the process in the next corner.
For the parts involving overhead weight, structural anchoring, or new wiring, bring in help. A contractor or licensed electrician is worth the call when you're hanging heavy shelving or adding an outlet. The sorting, labeling, and layout, though, are entirely yours — and one finished zone is often enough to make the whole garage feel different.
Photo: hi room / Pexels